Save
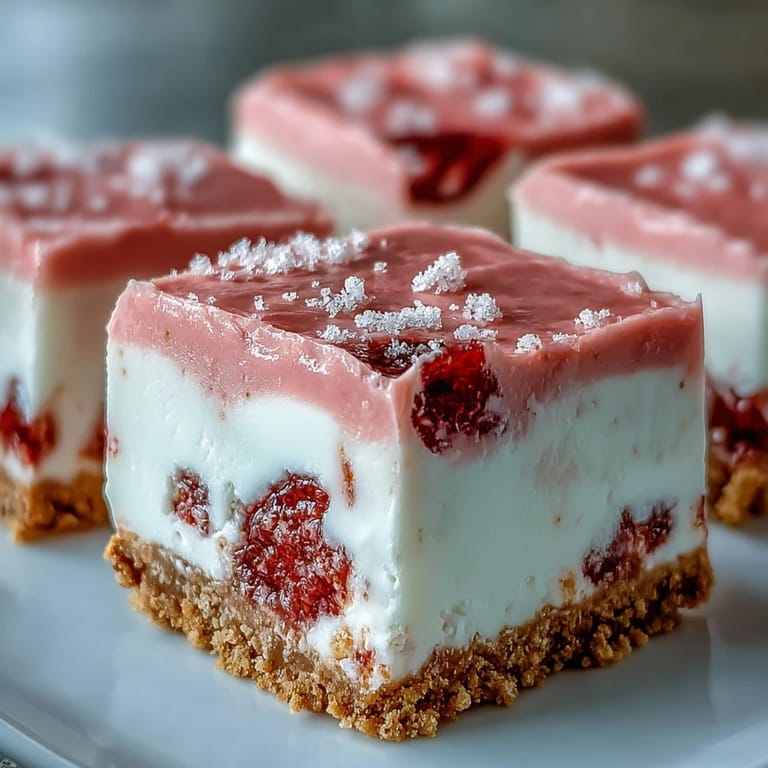
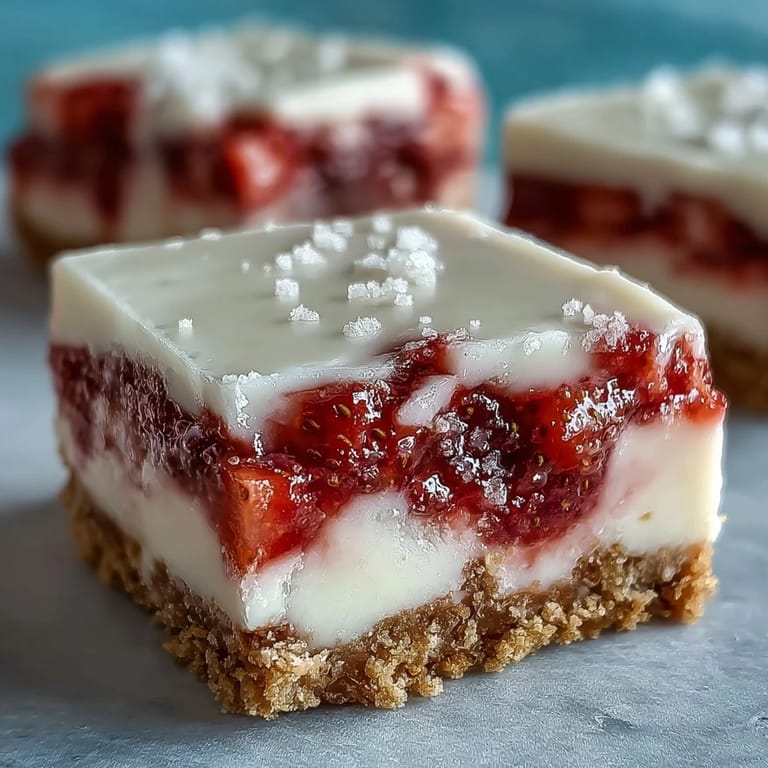
Save The first time I made these strawberry fudge squares, my kitchen smelled like a milkshake factory. I was skeptical about freeze-dried strawberries, but grinding them into powder creates this concentrated strawberry essence that fresh fruit just can't match. My roommate walked in, sniffed the air, and asked if I was making ice cream. When I told her it was fudge, she literally sat by the fridge waiting for them to set.
I brought these to a summer potluck last year, and honestly, I was worried they wouldn't stand out beside all the elaborate desserts. Within fifteen minutes, three different people had asked for the recipe. Someone told me they tasted like fancy chocolate shop fudge, and the best part was watching their faces when I said they took basically zero effort to make.
Ingredients
- 200 g digestive biscuits or graham crackers: The digestive biscuits give a slightly more sophisticated flavor, but graham crackers work beautifully for that classic s'mores vibe
- 100 g unsalted butter, melted: Don't skimp here, this butter is what holds your crust together and adds that rich foundation
- 200 g white chocolate chips: Use good quality white chocolate, the kind with real cocoa butter, because cheaper brands can seize up and become grainy
- 395 g sweetened condensed milk: This is the magic that turns melted chocolate into smooth, fudgy perfection
- 50 g freeze-dried strawberries: Ground into powder, these give an intense strawberry flavor without adding extra moisture that would mess up your fudge texture
- 1 tsp pure vanilla extract: Always use pure vanilla here, the fake stuff stands out unpleasantly in no-bake recipes
- Pinch of salt: Just enough to make the strawberry and white chocolate flavors pop without tasting salty
- Pink food coloring (optional): The strawberry powder gives a pale pink color, but food coloring makes these look as vibrant as they taste
Tired of Takeout? 🥡
Get 10 meals you can make faster than delivery arrives. Seriously.
One email. No spam. Unsubscribe anytime.
Instructions
- Prep your pan like a pro:
- Line your 8-inch square pan with parchment paper, letting it overhang on two sides. This overhang becomes your handles later, making it so much easier to lift the whole fudge block out.
- Build the buttery crust foundation:
- Mix your crushed biscuits with melted butter until every single crumb looks wet and coated. Press this mixture firmly into your pan, really getting into the corners. Pop it in the fridge for 10 minutes to set.
- Melt the chocolate gently:
- Set up a double boiler with simmering water underneath your heatproof bowl. Add the white chocolate and sweetened condensed milk, stirring gently until completely smooth. This low-and-slow approach prevents the chocolate from seizing.
- Infuse with strawberry magic:
- Remove from heat and stir in your strawberry powder, vanilla, salt, and food coloring. Mix until the color is uniform and the mixture smells like strawberry heaven.
- Assemble and set:
- Pour the fudge over your chilled crust and spread it evenly to all corners. Cover loosely and refrigerate for at least 2 to 3 hours until firm.
- The grand finale slice:
- Use the parchment handles to lift the fudge onto a cutting board. Slice into 16 squares, wiping your knife between cuts for those clean, professional edges.
 Save
Save These became my go-to contribution for every single gathering last summer. There's something about cutting through that firm fudge layer and hitting the crunch of the crust beneath that feels incredibly satisfying. My niece now asks for them specifically instead of cake for her birthday.
Mastering the Texture
The key to that perfect fudgy consistency is patience during the melting phase. Rushing the chocolate over direct heat will make it seize, turning your smooth mixture into a grainy disaster. I learned this the hard way during a midnight craving incident, and now I always budget extra time for gentle melting.
Make It Your Way
While the classic strawberry version is hard to beat, you can swap in freeze-dried raspberries for a slightly different berry profile. I've also added a tablespoon of strawberry jam to the fudge mixture for extra depth. Just keep in mind that any added liquid needs to be minimal to maintain that perfect texture.
Serving and Storage
These squares actually improve after a night in the fridge, as the flavors meld together and the texture becomes even fudgier. I like to take them out about 10 minutes before serving, letting them soften just enough to become perfectly creamy without losing their shape.
- Keep them well-covered, as these absorb fridge odors like nobody's business
- A sharp knife dipped in hot water cuts through cleanly, wiping between each slice
- Layer them between wax paper in an airtight container to prevent sticking
 Save
Save There's something deeply satisfying about a dessert that looks this impressive coming from such simple ingredients. Every time I serve these, I'm reminded that the best recipes don't need to be complicated to be unforgettable.
Recipe FAQ
- → How long do these fudge squares last and how should they be stored?
These squares can be stored in an airtight container in the refrigerator for up to 5 days. For best texture, let them sit at room temperature for 10 minutes before serving.
- → Can I use fresh strawberries instead of freeze-dried powder?
Yes, you can. If using fresh strawberries, purée 100g and strain it to remove seeds and excess liquid before incorporating it into the fudge mixture. This ensures a smooth consistency without adding too much moisture.
- → What if my fudge layer isn't setting firm enough?
Ensure you've chilled the squares for at least the recommended 3 hours, or even longer if needed, especially if your kitchen is warm. The quality of your sweetened condensed milk and white chocolate can also play a role; use good quality ingredients for optimal setting.
- → Is there a dairy-free alternative for this dessert?
Absolutely! You can make a dairy-free version by substituting dairy-free white chocolate chips and using coconut condensed milk. Ensure your graham crackers are also dairy-free if following a strict diet.
- → How can I enhance or alter the berry flavor?
You can adjust the strawberry intensity by varying the amount of freeze-dried strawberry powder. For a different berry twist, try swirling in a spoonful of crushed raspberries to create a marbled effect, or even a different type of berry powder.
- → What's the best way to cut clean squares?
For clean cuts, ensure the fudge is fully chilled and firm. Use a sharp knife, wiping the blade clean with a warm, damp cloth between each cut. Lifting the entire slab out of the pan using the parchment paper overhang before cutting also helps.