 Save
Save I discovered this recipe while browsing photos from my cousin's baby shower, where someone had arranged vegetables into tiny flower shapes on what looked like focaccia bread. It seemed impossibly fussy until I realized the magic wasn't in perfection—it was in the gesture itself, the quiet care of turning simple produce into edible art. That afternoon, I decided to try making it, and something shifted in how I thought about bread. It wasn't just sustenance anymore; it became a canvas for joy.
My neighbor stopped by while I was testing this, and I'll never forget how her daughter's eyes lit up when she spotted the edible pansy I'd tucked into one of the bell pepper blooms. She asked if the flowers were real and whether she was allowed to eat something so pretty. Her mother laughed and said, "That's the whole point." That question taught me more about this recipe's purpose than any instruction ever could.
Ingredients
- Bread flour (500 g): This gives you structure and elasticity; all-purpose flour works but won't have quite the same pull and chew.
- Instant yeast (2 tsp): Make sure it's fresh because stale yeast means a dough that won't rise with enthusiasm, and you'll feel the difference in every bite.
- Lukewarm water (325 ml): Temperature matters here—too hot kills the yeast, too cold and it wakes up slowly; aim for the warmth of bathwater.
- Extra-virgin olive oil (60 ml plus more for brushing): This is where flavor happens, so don't skimp or swap it for something neutral.
- Red and yellow bell peppers: Slice them thin enough to bend slightly without breaking; they're your flower petals and deserve respect.
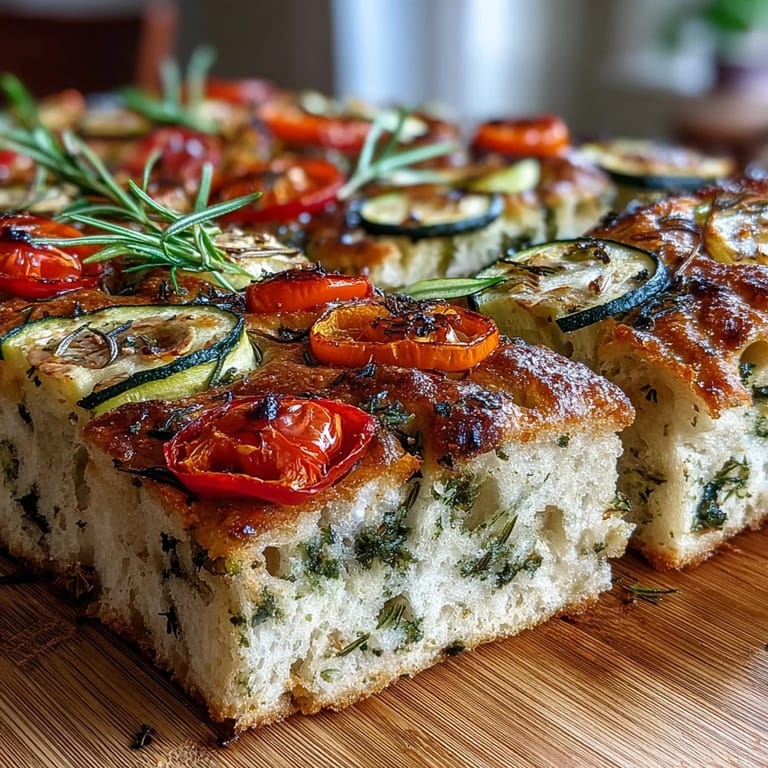
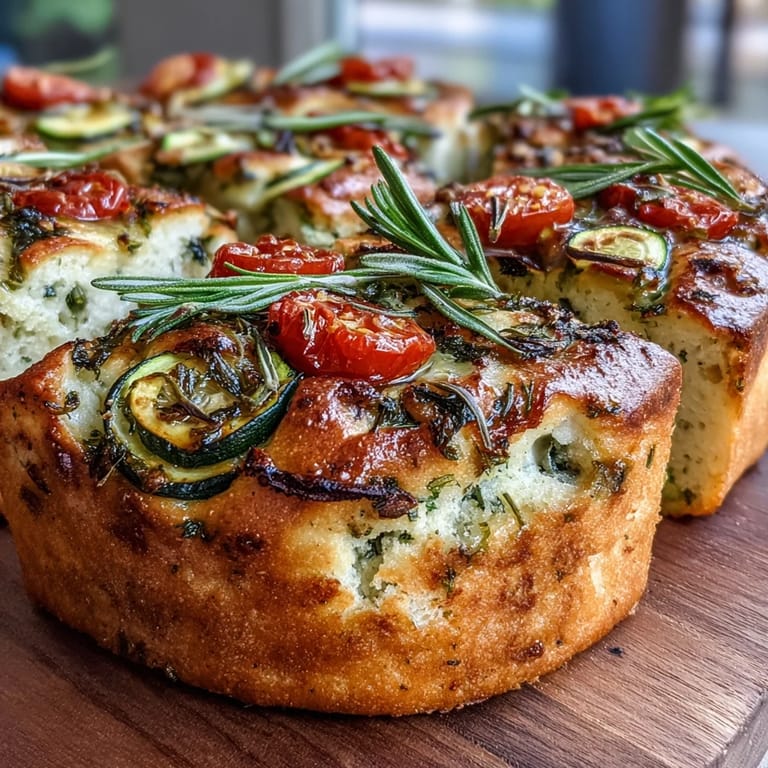
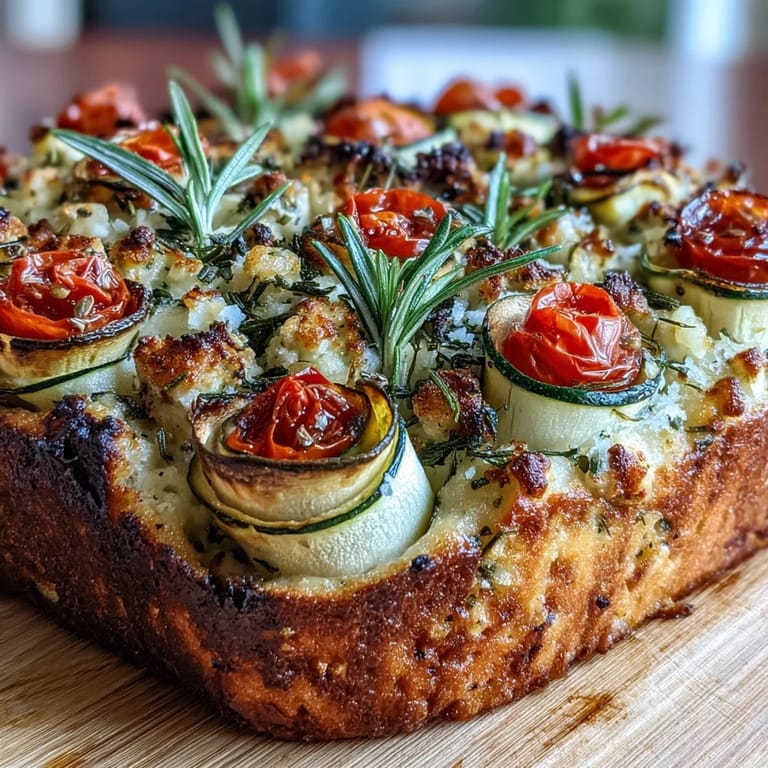
- Cherry tomatoes: These halves become flower centers, and their sweetness balances the herbs beautifully.
- Asparagus spears and fresh herbs: These create stems and foliage, and they're as much about visual storytelling as they are about taste.
- Edible flowers (optional): If you use them, source from a trusted supplier or grow your own; store-bought ones sometimes taste faintly metallic.
Tired of Takeout? 🥡
Get 10 meals you can make faster than delivery arrives. Seriously.
One email. No spam. Unsubscribe anytime.
Instructions
- Mix your dry foundation:
- In a large bowl, combine flour, yeast, sugar, and salt—this creates the flavor base before any liquid touches it. Making a well in the center and pouring in water and oil means you control how quickly they combine.
- Knead until the dough transforms:
- After 8 to 10 minutes of kneading, your dough should feel smooth and slightly elastic, like a soft earlobe. If using a mixer, let the dough hook do the work while you watch how the texture shifts from shaggy to cohesive.
- Let time do the heavy lifting:
- Oil your bowl lightly so the dough doesn't stick, cover it with something damp (I use a kitchen towel), and find a warm spot—a sunny windowsill, a turned-off oven, anywhere that feels cozy. After 1 to 2 hours, you'll have doubled dough that feels alive and puffy.
- Prep your canvas:
- Preheat to 220°C, line your baking sheet with parchment, and drizzle with olive oil so nothing sticks. When you stretch the dough to fit, use your fingertips to create shallow dimples—these aren't mistakes; they're what make focaccia focaccia.
- Arrange your garden:
- This is where patience meets play; there's no rush and no wrong way. Thin bell pepper rings become flower petals, cherry tomato halves become centers, asparagus spears become stems, and herbs become leaves—let your hands move like you're telling a story with vegetables.
- Season and rest:
- Sprinkle flaky sea salt and pepper over everything, then let it sit uncovered for 10 to 15 minutes; this gives the vegetables time to release their moisture into the dough, which actually helps it bake more evenly.
- Bake until golden:
- At 22 to 25 minutes, rotate the pan halfway through so the edges brown evenly without burning. The bread is done when it's golden, the bottoms sound hollow when tapped, and your kitchen smells like everything good about cooking.
 Save
Save My daughter asked if we could make this again the next week, not because it tasted exceptional, but because "making it felt like making something, not just eating something." That distinction has stayed with me—there's a difference between food you consume and food you create with intention. This bread is the latter.
The Art of Vegetable Arrangement
Think of this less as precise decoration and more as intuitive gardening. You're not creating botanical accuracy; you're capturing the feeling of flowers. Start with bell pepper rings as your largest petals, place a tomato half in the center, then build outward with smaller ingredients. The beauty is in the asymmetry—slightly wonky is more charming than perfect symmetry ever could be. If a slice falls or a herb doesn't stick, tuck it somewhere else or let it fall into the dough to add flavor where it lands.
Timing and Temperature Wisdom
The rise time of 1 to 2 hours isn't arbitrary; it depends on your kitchen's warmth. On a chilly day, it might need closer to 2 hours, while summer sunshine can speed things up. I learned this by setting a timer but also by touch—when the dough has doubled and feels pillowy, it's ready, regardless of the clock. The oven temperature of 220°C is hot enough to create a golden crust without charring the vegetables before the bread sets.
Making It Your Own
Seasonality is your guide here; whatever vegetables look bright at your market in spring becomes your palette. Winter might mean roasted root vegetables, summer could bring zucchini flowers and heirloom tomatoes, and fall invites thinly sliced beets and caramelized onions. The herb infusion of olive oil with garlic or lemon zest mentioned in the notes transforms the entire flavor profile, so don't skip it if you have time. Here's what I always keep in mind when I'm decorating or planning variations:
- The thinner you slice, the faster vegetables cook and the more delicate your art looks on the finished bread.
- Fresh edible flowers should be added in the last 5 minutes of baking so they stay vibrant and don't wilt into oblivion.
- Leftovers reheat best wrapped loosely in foil at 180°C for about 10 minutes, which brings back the crispness without drying it out.
 Save
Save This bread reminds us that food doesn't need to be complicated to be memorable; it just needs to be made with a little playfulness and care. Slice it warm, share it generously, and watch how something as simple as arranged vegetables becomes a conversation starter.
Recipe FAQ
- → What type of flour works best for this focaccia?
Bread flour is ideal as it provides the right gluten structure for a chewy and airy texture.
- → How can I achieve the floral vegetable decoration?
Slice vegetables thinly and arrange them in patterns resembling flowers, leaves, and stems on the dough before baking.
- → Can I prepare the dough in advance?
Yes, you can prepare the dough and refrigerate it overnight to develop flavor before shaping and topping.
- → What herbs complement the focaccia toppings?
Fresh rosemary, thyme, basil, parsley, chives, and dill add aromatic notes that enhance the vegetable flavors.
- → How do I ensure even baking of the focaccia?
Bake at 220°C (425°F) and rotate the pan halfway through to achieve an even golden crust.