 Save
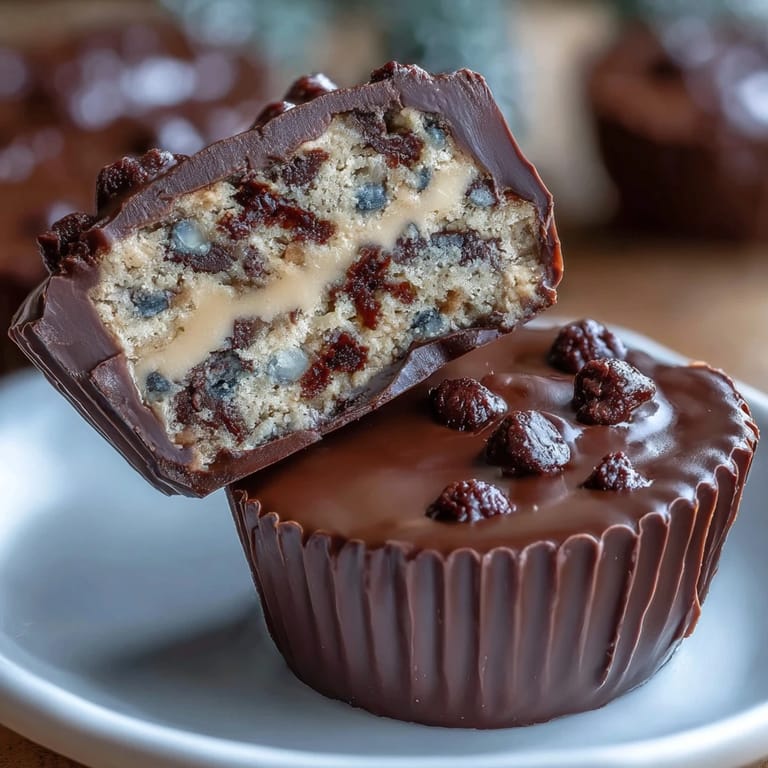
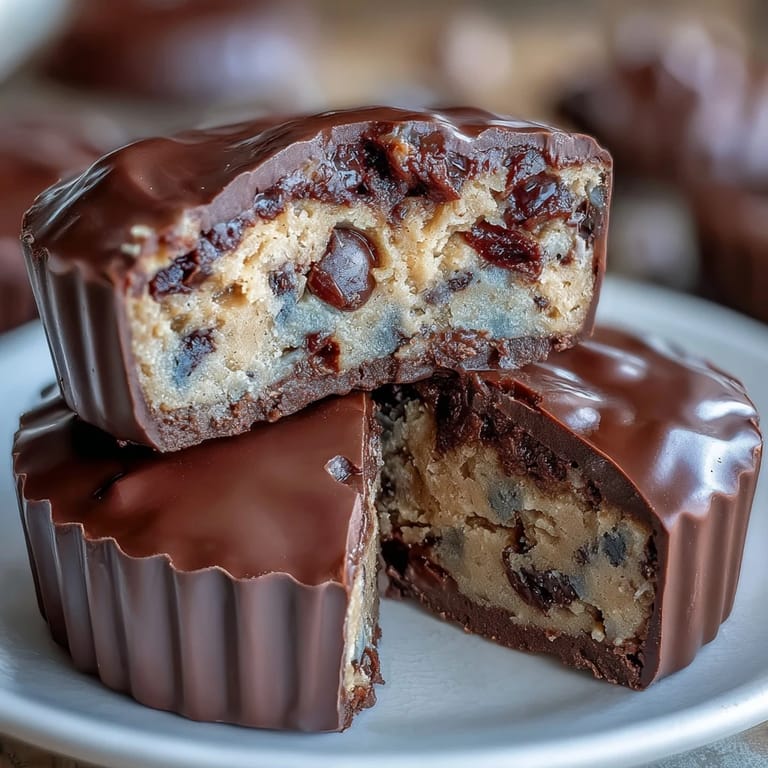
Save My friend Sarah texted me a photo of a candy shop window filled with gourmet peanut butter cups, and I realized I'd been buying the same mass-produced ones for years without question. That weekend, I decided to crack the code myself, but then thought: what if I stuffed them with something nobody expects? The answer came while I was stress-baking cookies at midnight, and suddenly the idea of edible cookie dough nestled between chocolate and peanut butter felt like the most obvious combination I'd somehow overlooked.
I brought a batch to my book club and watched everyone go silent, then start asking questions with their mouths full. One person actually said, 'Did you make these or did you lie to us?' That moment of suspicion-turning-to-belief is why I keep making them.
Ingredients
- Unsalted butter (1/4 cup softened, 2 tbsp melted): The softened butter in your dough needs to be truly soft so it creams properly; let it sit on the counter for 15 minutes and it'll mix like a dream.
- Light brown sugar and granulated sugar (1/4 cup and 2 tbsp): The combination of both sugars gives the dough that chewy, complex sweetness that makes people ask what your secret ingredient is.
- Vanilla extract (1/2 tsp): Don't skip this; it's what makes people say 'tastes like home' even if they've never had homemade peanut butter cups before.
- Milk (1 tbsp): This keeps your dough tender and almost melts on the tongue, making it feel less dense than traditional cookie dough.
- All-purpose flour, heat-treated (1/2 cup): Heat-treating eliminates any risk from raw flour, and honestly it takes two minutes and changes everything about feeling safe eating this raw.
- Salt (1/4 tsp for dough, pinch for peanut butter layer): Salt doesn't announce itself but makes every other flavor brighter and more defined.
- Mini chocolate chips (1/3 cup): Mini chips distribute better through the dough and give you consistent texture in every bite, unlike chunks that clump.
- Creamy peanut butter (1/2 cup): Use the good stuff here because it's the star of the show; natural peanut butter works but skip anything with added sugar.
- Powdered sugar (1/4 cup): This sweetens the peanut butter layer without making it grainy or stiff.
- Semisweet or milk chocolate chips (2 cups): The coating chocolate should be quality because thin layer means its flavor stands out; semisweet gives you that classic candy shop taste.
- Coconut oil or vegetable oil (2 tsp): This thinning agent prevents your chocolate from seizing and gives you that smooth, snappable shell.
Tired of Takeout? 🥡
Get 10 meals you can make faster than delivery arrives. Seriously.
One email. No spam. Unsubscribe anytime.
Instructions
- Heat-treat your flour first:
- Microwave it on high for 1 minute, stirring halfway through, or bake it at 350°F for 5 minutes. Let it cool completely before using it in your dough—this takes the anxiety out of eating raw flour.
- Cream the butter and sugars:
- Beat your softened butter with both sugars until it looks light and fluffy, about 2 minutes. This aeration is what makes your finished dough tender rather than dense and heavy.
- Mix in wet ingredients:
- Add vanilla and milk to your creamed mixture, beating just until combined. The milk will look separated at first but keep going—it'll come together.
- Combine dry ingredients:
- Add your cooled heat-treated flour and salt, mixing until no streaks remain. Fold in the mini chocolate chips gently so they stay intact.
- Chill the dough:
- Pop your bowl in the fridge while you prep the chocolate coating. Chilled dough is easier to portion and less likely to sink into the peanut butter layer.
- Line your muffin tin:
- Use paper liners in all 12 cups; this makes removal effortless and keeps everything looking polished.
- Melt chocolate with oil:
- Melt your chocolate chips and coconut oil together in 30-second bursts in the microwave, stirring between each burst. This gentle method prevents seizing and gives you glossy, smooth chocolate.
- Create the chocolate base:
- Spoon about 1 tablespoon of melted chocolate into each liner, then tilt or tap the pan so it coats the bottom evenly. You want a thin but complete layer so your cup has structure.
- Freeze the chocolate base:
- Pop the tin in the freezer for exactly 10 minutes. This gives you a firm foundation that won't crack when you add the next layer.
- Make the peanut butter layer:
- While chocolate sets, mix your peanut butter with melted butter, powdered sugar, and a tiny pinch of salt until completely smooth. This mixture should feel spreadable but not too soft.
- Add the peanut butter:
- Drop a generous teaspoon of peanut butter mixture onto the set chocolate in each cup, then gently flatten it with the back of your spoon. Leave a small border so chocolate can seal the edges.
- Layer in the cookie dough:
- Scoop about 1 teaspoon of your chilled cookie dough and press it gently onto the peanut butter in each cup. It'll warm slightly from your hands, which helps it stick.
- Top with chocolate:
- Spoon or drizzle enough melted chocolate over each cup to cover the filling completely, smoothing the top gently with the back of a spoon. Make sure chocolate reaches the edges to seal everything inside.
- Final chill:
- Refrigerate for at least 20 minutes or freeze for 10 minutes until completely set. You'll know they're ready when the chocolate snaps when you bite into it.
 Save
Save My sister, who usually refuses anything homemade in favor of store-bought, asked me to make these specifically for her daughter's sleepover party. Watching a room full of 10-year-olds discover that homemade candy is not only possible but also better than the stuff their parents buy them was unexpectedly moving. That's when I realized these aren't just candy; they're proof that patience and a few good ingredients beat shortcuts every single time.
The Secret Behind Perfect Layering
The key to these cups holding together is temperature management, not complicated technique. Each layer needs to be set before you add the next one, which means you're playing a careful game of warm enough to spread but cold enough to hold structure. I learned this the hard way when I tried to rush and ended up with chocolate-peanut butter mud instead of distinct layers. Now I set phone reminders for chilling time, and it feels silly until you pull a perfectly structured cup from the liner.
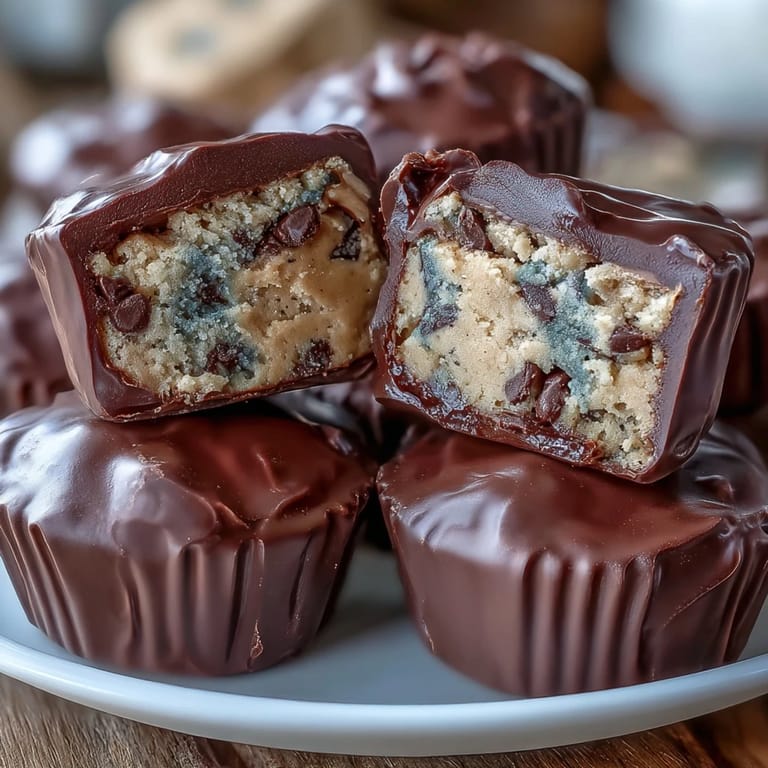
Why Cookie Dough Belongs in Candy
Cookie dough is the most underrated candy filling because it's familiar but still feels luxurious when it's good. The heat-treated flour means you lose nothing in terms of taste, and the mini chocolate chips give you texture and visual appeal without the bulk of full-size chips. I've experimented with adding peanut butter directly to the dough, adding sea salt on top before the final chill, and even pressing a single chocolate chip into the top of each one for visual appeal. Every variation works, but the original is perfect because it respects each component equally.
Storage, Variations, and When to Make These
These cups live happily in an airtight container in your refrigerator for about a week, though they rarely last that long in my house. Make them on a calm weekend when you're not rushed, because the rhythm of layering and chilling is actually meditative if you're not anxious about timeline. They're impressive enough for gifts, casual enough for yourself, and foolproof enough that you'll want to make them repeatedly.
- Try dark chocolate for a more sophisticated, less sweet version that lets the peanut butter shine.
- Sprinkle a tiny pinch of flaky sea salt on top before the final chill for a flavor pop that surprises people.
- Use almond milk or oat milk in the dough if you're avoiding dairy, and the texture stays virtually identical.
 Save
Save These peanut butter cups changed the way I think about candy—that it doesn't need to be complicated, just thoughtful and made with care. Once you understand how they come together, you'll make them forever.
Recipe FAQ
- → How is the cookie dough made safe to eat?
The flour is heat-treated by microwaving or baking at 350°F for 5 minutes to eliminate harmful bacteria, making the dough safe without eggs.
- → Can I use dairy-free alternatives?
Yes, almond or oat milk can replace regular milk, and use dairy-free chocolate chips to keep it vegan-friendly.
- → What type of chocolate works best for coating?
Semisweet or milk chocolate chips melt smoothly and provide a balanced sweetness, but dark chocolate offers a richer flavor option.
- → Is baking required for these treats?
No baking is needed; the treats set by chilling in the freezer and refrigerator to firm up the layers.
- → How should these cups be stored?
Store them in an airtight container in the refrigerator to maintain freshness and texture.