 Save
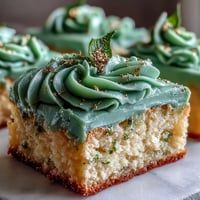
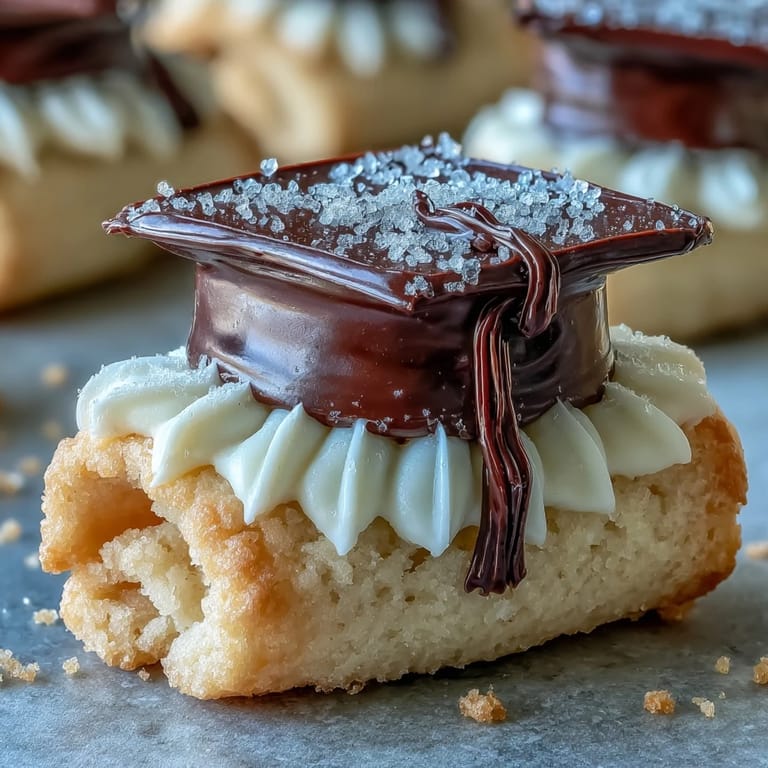
Save Butter melting into sugar, the kitchen suddenly felt festive as I rolled out soft dough and pressed cap and diploma shapes for the first time. The hum of the mixer was nearly drowned out by the excited chatter about the upcoming graduation party. I marveled that something as simple as a cookie could capture so much celebration in a single bite. The scent of vanilla and almond drifted up, blending with the anticipation. Decorating them in gold was like granting each cookie its own tiny diploma.
One late spring afternoon, my countertop was scattered with cookies cooling and the luster dust shimmered under the kitchen light. My younger cousin hovered, eager to pipe a tassel on a cookie that would go straight into her mouth, gold paint and all. The family spilled in to sneak tastes, offering opinions about cap angles and arguing over whether the almond or the lemon version was superior. We laughed, and somehow, the cookies felt as much a part of the milestone as the cap and gown itself.
Ingredients
- All-purpose flour: Choosing a high-quality, unbleached flour ensures the cookies hold their shape and bake evenly for sharp edges.
- Unsalted butter: Room temperature is key for proper creaming, making the cookies tender and flavorful without overspreading.
- Granulated sugar: Creaming well with butter makes the cookies light and delicately crisp at the edges.
- Large egg: Adds structure and a hint of richness, so be sure it's at room temperature for even blending.
- Pure vanilla extract: Provides the main layer of flavor; I've found imitation just doesn't compare in subtlety or warmth.
- Almond extract (optional): A tiny bit goes a long way, adding bakery-style aroma (or try lemon for a fresh surprise).
- Salt: A pinch sharpens all the flavors and balances the sweetness.
- Powdered sugar (for royal icing): Sifting prevents lumps, so the icing pipes smoothly for clean outlines and intricate details.
- Egg whites or meringue powder: Using meringue powder makes the icing safer and keeps it shelf-stable without sacrificing shine.
- Cream of tartar: This stabilizer helps the icing stay fluffy and hold peaks, making decorating more forgiving.
- Vanilla extract (for icing): Adds flavor to the royal icing; just a few drops to avoid watering down the texture.
- Black gel food coloring: Achieves bold color for cap details with just a little; liquid color could thin out icing too much.
- Gold edible luster dust + clear alcohol or lemon extract: Painting with luster dust brings celebratory sparkle you can't get from colored icing alone.
Tired of Takeout? 🥡
Get 10 meals you can make faster than delivery arrives. Seriously.
One email. No spam. Unsubscribe anytime.
Instructions
- Cream the butter and sugar:
- With the mixer on medium, beat butter and sugar together until the mixture is pale, airy, and almost fluffy—it should stick a bit to the side of the bowl.
- Add egg and extracts:
- Crack in the egg, pour in vanilla and almond extract if using, and continue mixing just until combined and smooth.
- Mix in dry ingredients:
- Gradually add flour and salt; the dough will look crumbly at first but comes together if you mix only until smooth—avoid overmixing.
- Chill the dough:
- Divide dough, pat into two discs, wrap, and chill for at least 45 minutes so it firms up and is easier to roll without sticking.
- Prepare for baking:
- Line your trays with parchment and preheat the oven to 350F—meanwhile, dust the counter with flour.
- Roll out and cut shapes:
- Take one disc at a time, roll to 1/4-inch thick, then press your diploma and cap cutters in, wiggling them gently for clean edges.
- Bake the cookies:
- Transfer cookies to baking sheets, spacing them a bit apart, and bake for about 8 to 10 minutes until just the edges start to go gold.
- Cool completely:
- Let them cool on the tray for a few minutes, then use a thin spatula to move them to wire racks until not even a hint of warmth remains.
- Make the royal icing:
- Beat egg whites or meringue powder and water until frothy; add powdered sugar and cream of tartar gradually, then vanilla, mixing until glossy and thick enough to hold a peak.
- Tint and prep the icing:
- Divide icing into bowls—color some black for caps, keep some white for diplomas, reserve some to paint gold details after decorating.
- Decorate cookies:
- Pipe outlines on cool cookies first, then flood with more icing; use a toothpick to coax icing to the edges, and add details like tassels and scrolls once the base sets.
- Apply gold accents:
- Mix gold luster dust with a drop of clear alcohol until it looks like liquid gold and brush it gently onto dry icing for dazzling ribbons and tassels.
 Save
Save 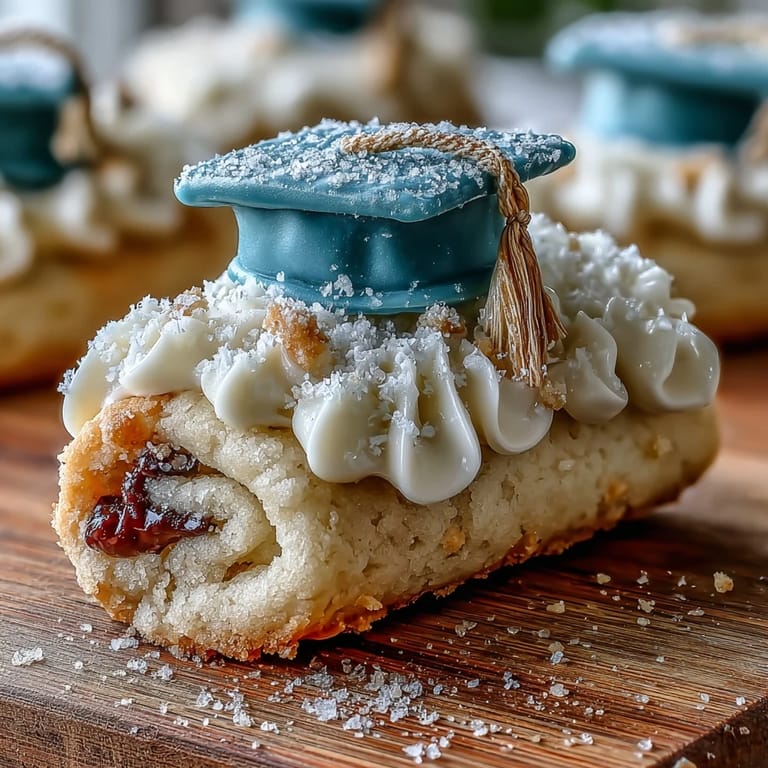 Save
Save Watching our graduate’s eyes light up when she recognized her own gold-accented cookie among the tray was a tiny, proud moment that somehow felt bigger than the ceremony. It turns out that even a few shimmering cookies can capture a whole lot of achievement and joy.
If Youre New to Royal Icing
The first time I tried piping royal icing, my hands were unsteady and I wondered if my shaky outlines would ever look as polished as the ones on Instagram. The reality is: every cookie is its own tiny celebration, perfect or not. If your lines wobble, add a little extra tassel—or let the gold paint mask any quirks. Royal icing dries rock hard, so there’s time to fix minor smudges; just keep a damp cloth handy for a fresh start when a tip clogs.
Making Ahead and Storing
Prepping these cookies in stages is a sanity saver—bake and store them plain in an airtight container for up to a week, and decorate when you have the creative energy. Unused royal icing stores well in the fridge for a couple days; just bring it to room temperature and stir thoroughly before using. The gold details truly shine after a night’s rest, so don’t fret about making everything the same day. If serving outside, pack cookies in a sturdy box and use a layer of parchment between stacks.
So Many Ways to Personalize
The magic is in the details: add initials to each cap, pipe tiny scroll ties in school colors, or dust some cookies with extra sparkle for standout guests. The blank sugar cookie is forgiving and fun whether you’re going classic or making every design unique.
- Make extra gold icing for touch-ups, just in case.
- A food-safe fine brush is worth having for those tassel details.
- Be sure cookies are fully dry before packing or stacking them for transport.
 Save
Save 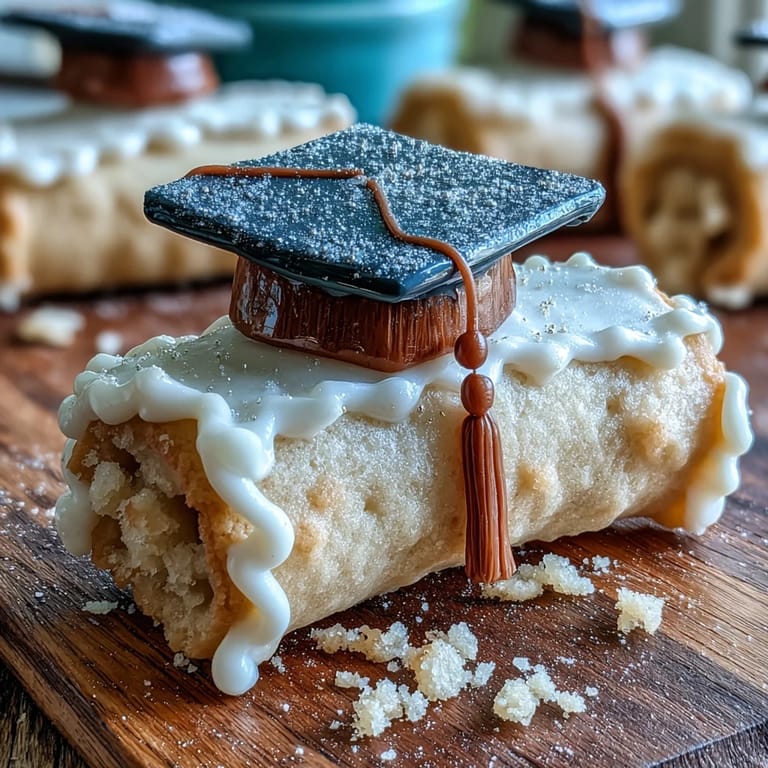 Save
Save Whether you’re celebrating a big accomplishment or just sharing sweets for fun, these gold-decorated cookies will always bring a festive sparkle to the table. Enjoy every bite, and don’t forget to sneak one for the chef.
Recipe FAQ
- → How do I stop the cookies from spreading?
Keep the dough chilled for at least 45 minutes before rolling, roll to an even 1/4-inch thickness, and avoid overworking the dough. Use chilled baking sheets and bake until edges just begin to color.
- → What gives royal icing a smooth flood finish?
Beat egg whites (or meringue powder) with powdered sugar and cream of tartar to glossy, stiff peaks, then thin slightly with water to reach flood consistency. Use a piping outline to contain the flood, then fill and tap gently to remove air bubbles.
- → How do I achieve bright black and metallic gold accents?
Use gel color to tint a portion of icing black for caps, as gels preserve consistency. Mix gold luster dust with a few drops of clear alcohol or lemon extract to make a paint, and apply with a fine food-safe brush once icing has set.
- → Can meringue powder replace egg whites for the icing?
Yes — substitute 4 tablespoons meringue powder with 6 tablespoons water for two egg whites. Meringue powder offers stability and longer shelf life for royal icing while delivering similar stiffness.
- → How should I store decorated cookies?
Allow icing and any gold detailing to dry completely, then layer cookies in an airtight container with parchment between layers. Stored at room temperature, they keep well for up to one week.
- → Any tips for piping tassels and ribbons?
Use small round tips for fine lines and a slightly thicker tip for tassel texture. Pipe slowly, use a steady hand, and let each color set briefly if you’re layering details to prevent bleeding.