 Save
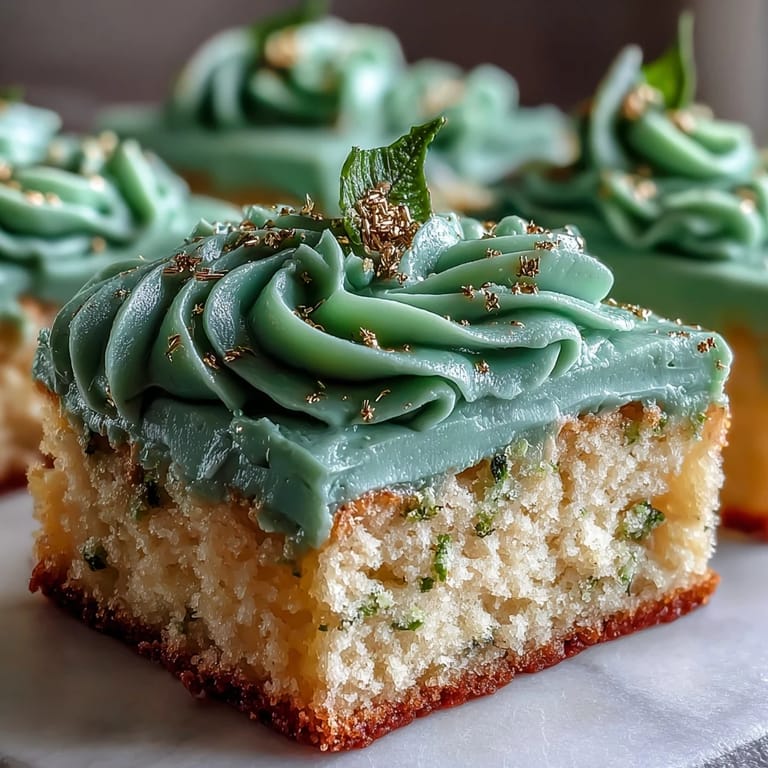
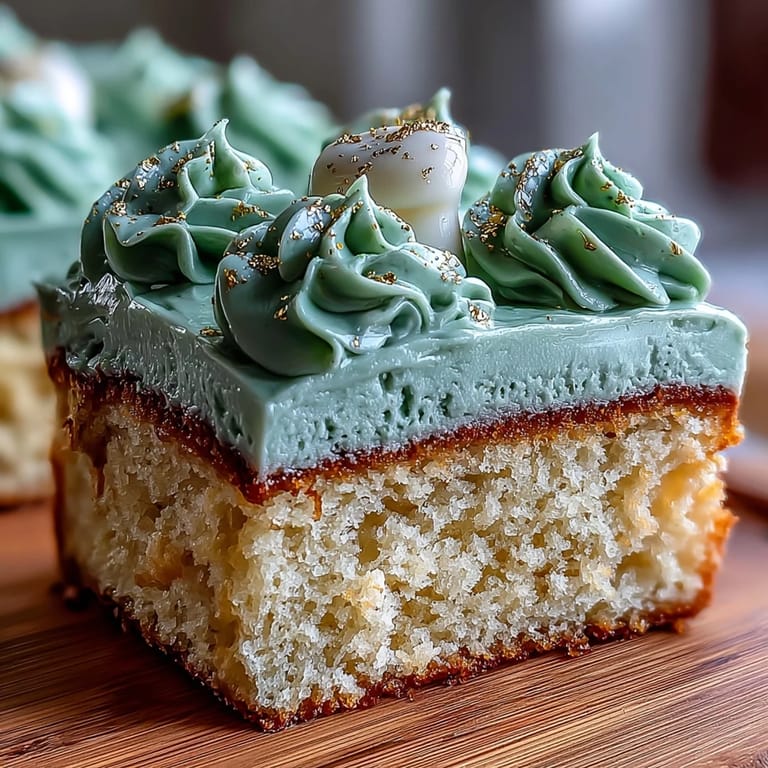
Save The sound of balloons popping and the soft clink of forks against plates lingered around our kitchen as I tried out this sage green and gold buttercream sheet cake for the first graduation we ever hosted. The scent of vanilla and butter seemed to amplify the anticipation—especially as my hands trembled slightly piping the gold accents, determined to get it just right. It was a cake I wanted to look as celebratory as the moment itself, but the real surprise was how relaxed I felt swirling colors together on a sunlit afternoon. Decorating felt less like a task and more like the final toast of the party. By the end, my fingertips sparkled with edible gold, just like our graduates’ eyes when they saw the cake.
When we pulled out this cake for my cousin’s graduation, the kitchen door kept swinging open as everyone tried to sneak a peek. We ended up laughing over the smudged corner where someone’s finger had made an early test swipe through the buttercream—no one confessed, but the missing bite made for the best family photo of the night.
Ingredients
- All-purpose flour: The foundation for a sturdy yet tender crumb—measure carefully for a light, even bake.
- Baking powder: Gives that gentle lift, so you’ll see a golden top without dry spots.
- Salt: Just a pinch sharpens the sweetness—don’t skip it, even if you’re tempted.
- Unsalted butter: Room temperature is key; patience here means creamy batter and lush frosting.
- Granulated sugar: For sweetness and a wonderful golden crust—sifting makes a fluffier cake.
- Eggs: Warm them up so the batter blends smoothly, ensuring no curdling or streaks.
- Pure vanilla extract: The soul of this cake—real vanilla sings through each bite.
- Whole milk: Adds richness; letting it come to room temperature helps prevent a lumpy batter.
- Powdered sugar: For the silkiest buttercream, sift it well to avoid lumps.
- Heavy cream or milk: Adjusts your frosting’s texture—add it slowly so you hit the perfect spreadable consistency.
- Sage green gel food coloring: Gel delivers vivid color with no aftertaste—add a tiny bit at a time for that perfect shade.
- Gold edible luster dust: Brings a luxurious finish—mix with clear vanilla for extra dazzle on the details.
- Clear vanilla extract or vodka: Thins the luster dust for painting, but skip if you want extra marbling.
- Optional extracts (chocolate, lemon, almond): Give your cake a twist depending on the crowd or celebration.
Tired of Takeout? 🥡
Get 10 meals you can make faster than delivery arrives. Seriously.
One email. No spam. Unsubscribe anytime.
Instructions
- Get everything set:
- Turn the oven to 350°F (175°C), press parchment paper snugly in the 12×18 inch pan, and grease well—no sticking surprises today.
- Mix the dry magic:
- In a medium bowl, whisk together flour, baking powder, and salt until everything’s one unified pale cloud.
- Cream and dream:
- Beat the butter and sugar together for a good 3–4 minutes, until it looks lighter and you can feel the airiness if you run a spoon through it.
- Eggs and vanilla go in:
- Add eggs one by one, blending thoroughly with each—stir in vanilla for that sweet perfume.
- Build the batter:
- Add the flour mixture in thirds, alternating with milk, gently folding after each addition until just combined—stop once you no longer see dry streaks.
- Bake and wait:
- Pour the batter into the prepared pan, spread evenly, and bake 28–32 minutes—the aroma will let you know it’s nearly done. Test with a toothpick, and let it cool fully before frosting so the buttercream stays perfect.
- Whip the buttercream:
- In a fresh bowl, beat butter till smooth; slowly add powdered sugar, then vanilla, salt, and a splash of cream or milk at a time until it’s cloudlike but holds its shape.
- Get that sage color:
- Tint most of your buttercream with sage gel little by little—go slow, and aim for that soft earthy green. Save about half a cup plain for gold details.
- Ice it smooth:
- Spread the sage buttercream in even swirls across your cool cake, smoothing with an offset spatula for a flawless look.
- Gold accents, gleam and gleam:
- Mix gold luster dust with clear vanilla or vodka until it’s like liquid gold—paint onto piped details or marbled into the buttercream with a brush.
- Celebrate in style:
- Add graduation caps, piping, sprinkles—let your imagination and the occasion guide the finishing touches.
 Save
Save  Save
Save There’s a photo framed on our kitchen wall of everyone crowded around the finished cake, holding up forks as someone made an impromptu toast. That was the year even the most camera-shy of us wanted to be in front, and for a few minutes, it felt like the celebration would never end.
Decorating with Gold: Festive and Elegant
The first time I painted with luster dust, I held my breath, worried I’d mess up the design, but it was surprisingly forgiving. The accents don’t need to be perfect—they catch the light and give the cake that luxurious, party-ready look. I learned to dab lightly and use a gentle touch, sometimes swirling in a little extra for a bolder pop. Play around with shapes, and don’t hesitate to layer, as the fun is in the transformation. Extra gold always seems to find its way onto fingers and countertops, so keep a damp cloth handy for easy cleanup.
Customizing for the Crowd
The vanilla base is like a delicious blank canvas—you can swap in almond, lemon, or chocolate extracts depending on your mood or guest list. Adding a splash of flavoring to the buttercream is another fun twist, especially if you know the graduate’s favorite. One year we tinted the buttercream a soft lavender for a spring party and used silver dust for shimmer, and it was just as enchanting. This recipe has taken on a different personality every time it’s made, reflecting someone special each season. Once you master the base, the possibilities for color and taste are endless.
Serving, Storing, and Slicing Like a Pro
Slicing neatly for a crowd turned out to be all about chilling the cake first; that extra patience means every square comes out picture perfect. Leftovers store beautifully if covered and refrigerated—the buttercream stays creamy, even a day or two later. When serving, let the cake come back to room temperature for the full soft, fluffy texture. Clean your knife often between cuts to make the gold accents pop on each slice.
- Use parchment to help lift the cake easily from the pan.
- If coloring frosting, let it rest 10 minutes to deepen.
- Start cutting from the center out for even pieces.
 Save
Save 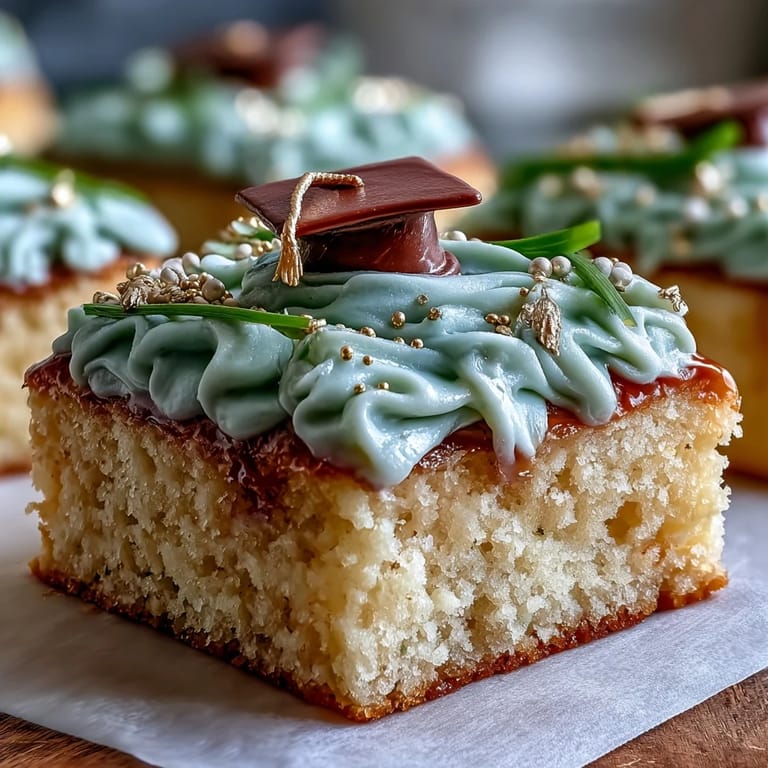 Save
Save Here’s hoping this cake brings as many smiles to your celebrations as it has to ours. It’s a showstopper, but also a sweet reminder to enjoy every messy, joyful moment in the kitchen together.
Recipe FAQ
- → How do I know when the sheet cake is done?
Bake at 350°F for 28–32 minutes in a 12×18 pan. Insert a toothpick into the center — it should come out clean or with a few moist crumbs. Edges will pull slightly from the pan when fully baked.
- → How do I achieve a smooth, spreadable sage-green buttercream?
Beat room-temperature butter until creamy, then gradually add sifted powdered sugar. Add vanilla and cream 1 Tbsp at a time to reach a spreadable consistency. Add gel color a little at a time to build a soft sage hue without thinning the frosting too much.
- → What’s the best way to make gold accents?
Mix edible gold luster dust with a few drops of clear vanilla or vodka to form a paint, then use a food-safe brush to paint piped details or dry-paint smooth areas. Alternatively, stir luster dust into the reserved buttercream for a marbled gold effect.
- → Can I swap flavors or make variations?
Yes — swap vanilla extract for almond, lemon, or cocoa to alter the base flavor. Add zest or folded-in ingredients like chocolate chips, but adjust wet/dry ratios slightly to maintain batter consistency.
- → How should I store and make this ahead?
Cover and refrigerate the frosted cake for up to 3 days; bring to room temperature before serving to soften the buttercream. For longer storage, cut into squares, wrap tightly, and freeze up to 1 month.
- → Are there safe substitutions for dietary needs?
Use a cup-for-cup gluten-free flour blend for a gluten-free version — texture may be slightly denser. Confirm that edible luster dust and other decorations are suitable for specific dietary restrictions.