 Save
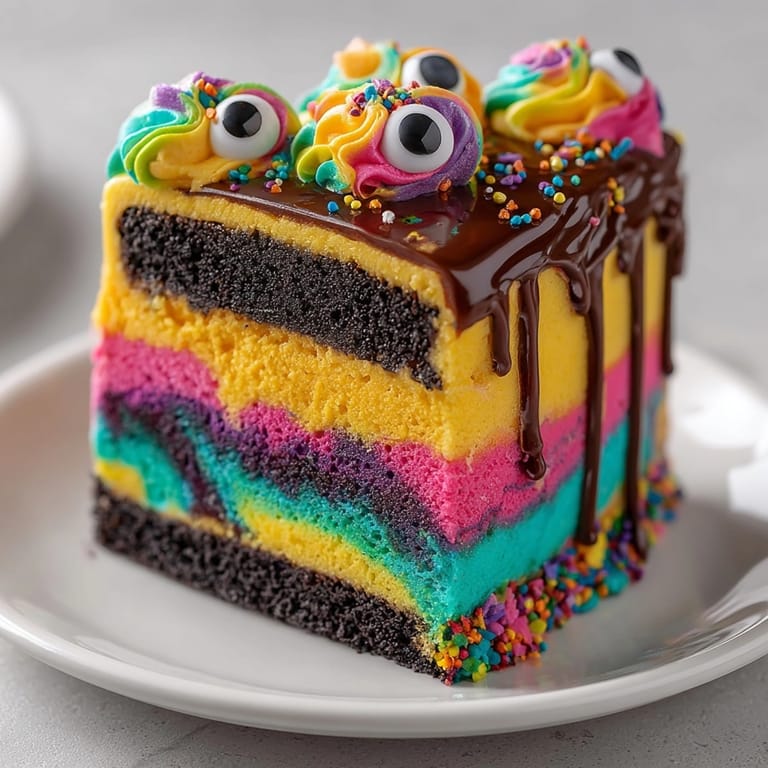
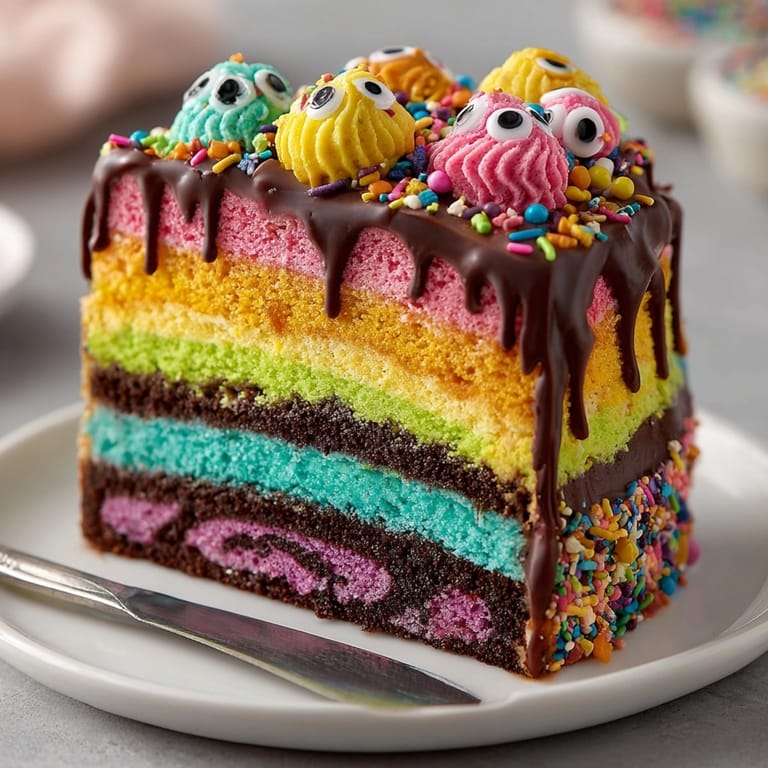
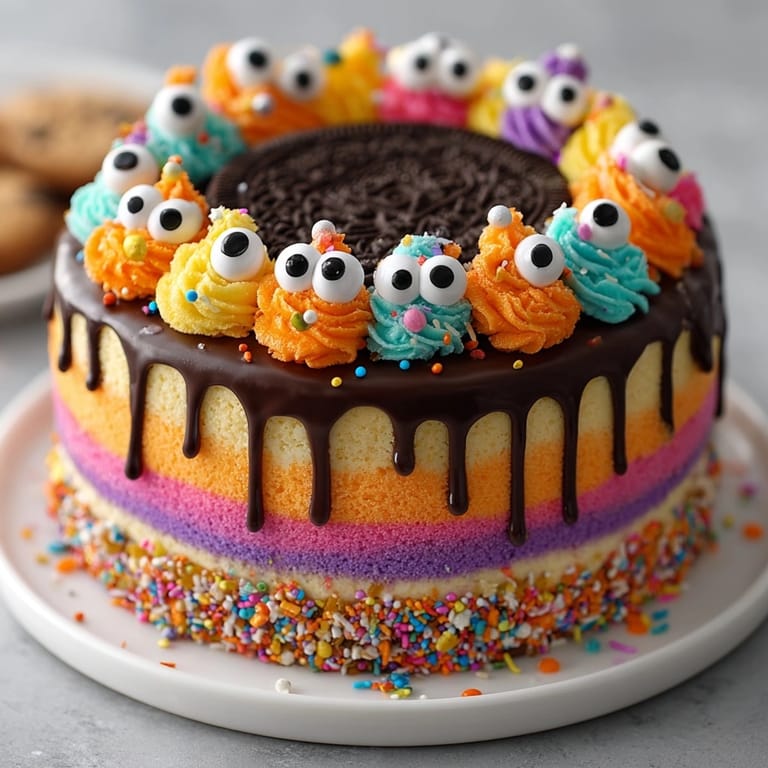
Save Neon Monster Drip Layer Cake always steals the show at any party or celebration with its wild neon colors and crazy chocolate drip. The vibrant layers make everyone gasp when you slice into it. Fluffy buttercream and fudgy chocolate top off the playful monster theme. Kids and grownups line up for a piece right away.
My favorite memory with this cake was at my niece's sixth birthday everyone wanted a neon slice and helped decorate with icing squiggles and candy eyes. I admit I still get excited pulling out those food colorings each time.
Ingredients
- All-purpose flour: brings the necessary structure for tall cake layers look for unbleached and sift for fluffiness
- Baking powder and baking soda: work together making the cake rise evenly always use fresh for best lift
- Unsalted butter: gives richness and fluff use European style for extra flavor
- Granulated sugar: sweetens and moistens the crumb look for fine texture for easy mixing
- Eggs: add tenderness and hold the cake together be sure they are room temperature for smooth batter
- Vanilla extract: provides depth and warmth choose real vanilla for stronger aroma
- Whole milk: helps keep the cake super moist whole milk is best for richness
- Gel food coloring: is essential for vibrant neon hues pick gel over liquid for stronger color and less thinning of batter
- Powdered sugar: creates silky buttercream sift to avoid lumps
- Heavy cream: makes the frosting smooth and glossy use chilling cream for the best whip
- Semi-sweet chocolate chips: make the perfect drip choose high cocoa content for bold flavor
- Sprinkles and candy eyes for decorating: adds texture and monster charm look for bright colored ones for fun effect
Tired of Takeout? 🥡
Get 10 meals you can make faster than delivery arrives. Seriously.
One email. No spam. Unsubscribe anytime.
Instructions
- Prepare the Pans:
- Grease three round cake pans with lots of butter and line the bases with parchment paper ensuring cakes won't stick and release cleanly after baking
- Mix Dry Ingredients:
- Using a medium bowl combine flour baking powder baking soda and salt. Whisk together thoroughly until all white streaks are gone which guarantees even texture
- Cream Butter and Sugar:
- Beat unsalted butter with granulated sugar in a large mixing bowl for about three minutes using an electric mixer. Work until the mixture is very pale and fluffy this captures air and sets up those light layers
- Incorporate Eggs and Vanilla:
- Add eggs one at a time mixing well after each addition so everything emulsifies smoothly. Then blend in vanilla extract
- Alternate Dry with Milk:
- Begin adding the flour mixture to the butter sugar base alternating with the milk starting and finishing with dry ingredients. Mix on low only until just combined to keep the batter tender
- Divide and Tint Batter:
- Split the batter evenly into five bowls. Tint each bowl with a separate neon gel color stirring until individual hues are fully saturated and bright
- Create Marbled Layers:
- Spoon dollops of each colored batter into the pans creating random swirls and pockets. Drag a skewer or spoon through the batter for a dramatic marbled look but avoid overmixing so colors stay defined
- Bake the Layers:
- Bake the pans in a preheated oven at 350°F until a toothpick poked into the center comes out clean. Cool cakes in their pans for ten minutes then turn out onto a wire rack to cool completely before frosting
- Mix Buttercream:
- Beat softened butter until creamy and smooth. Add powdered sugar gradually so you avoid lumps and clouds. Pour in cream vanilla and salt. Once fluffy split among five bowls and tint each with neon gel coloring
- Stack and Fill:
- Level cake layers if needed by slicing the tops flat for sturdy stacking. Spread neon buttercream between the layers alternating colors for a rainbow effect. Press layers gently so everything lines up neatly
- Crumb Coat and Frost:
- Apply a thin coating of buttercream all over the cake to trap any crumbs. Chill this for thirty minutes then frost the whole cake with thick swirls or bright stripes of neon buttercream using an offset spatula for smooth sides
- Make the Chocolate Drip:
- Warm heavy cream until steaming on the stove then pour over chocolate chips in a bowl. Let it sit briefly then stir until perfectly smooth. If you like go wild and tint the chocolate with oil-based neon coloring for extra drama
- Drip the Cake:
- Cool the chocolate slightly then drip it around the cake edges with a spoon or squeeze bottle letting it run down the sides like monster goo
- Finish Decorating:
- Top the cake with extra buttercream swirls sprinkles or candy eyes to complete the playful monster look lots of fun for kids to help with this step
 Save
Save No slice ever looks exactly the same and that is one of my favorite things. When we made this for Halloween the kids went wild with piles of candy eyes and whipped up extra neon buttercream for monster lips and fangs. The best part is snapping photos of bright slices before they disappear.
Storage Tips
Store the finished cake covered at room temperature for up to two days as long as it is not a hot humid day. For longer keeping wrap it tightly and refrigerate for up to five days. If you have leftovers freeze slices individually by wrapping each in plastic and then placing in a freezer bag. Thaw at room temperature for best texture.
Ingredient Substitutions
You can swap all-purpose flour for a gluten-free blend made for baking for guests who need it. Not a fan of semi-sweet chocolate drip Try white chocolate and add neon gel for a bold twist. The buttercream works just as well with dairy-free butter and coconut cream for those who avoid dairy.
Serving Suggestions
This cake shines at birthday parties but it also makes a showstopper for Halloween or school events. Slice with a sharp knife cleaned between cuts so the colors stay vivid. Serve with a side of whipped cream or a scoop of vanilla ice cream for extra indulgence.
Cultural Historical Context
Layer cakes became popular in American celebrations in the early twentieth century. Adding bold food coloring and themed decorations is a modern twist seen in party cakes and baking competitions. The monster motif draws from pop culture and childhood nostalgia embracing Halloween and playful baking traditions.
Seasonal Adaptations
Use bright reds and greens with peppermint extract for a holiday version Swap neon colors for pastels at Easter or spring parties Try orange black and purple for the ultimate Halloween cake
 Save
Save The neon colors and monster theme make this cake unforgettable. Share a slice and watch the whole party light up.
Recipe FAQ
- → How do I achieve vibrant neon colors in my cake layers?
Use high-quality gel food coloring and mix thoroughly into each bowl of batter until the desired brightness is reached.
- → Will the chocolate drip work with regular food coloring?
No, only oil-based food coloring should be used to tint chocolate, as water-based colors can cause it to seize.
- → Can I make this cake gluten-free?
Yes, simply replace the all-purpose flour with a 1:1 gluten-free flour blend for a similar texture and taste.
- → What is the best way to assemble and frost the layers?
Level cooled layers, alternate neon buttercream fillings, and apply a thin crumb coat before final, vibrant frosting.
- → How should I store this cake after decorating?
Keep the cake covered at room temperature for up to 2 days, or in the refrigerator for up to 5 days.
- → Can I use natural food coloring for neon effects?
Natural options rarely achieve true neon brightness; gel food coloring is best for intense hues in this cake.