 Save
Save This whimsical Root Beer Snowcap Hot Cocoa Float has become my winter signature treat whenever I want to impress guests with something unexpected yet nostalgic. The magical combination of warm chocolate meeting fizzy root beer creates an experience that's both comforting and exciting at the same time.
I first created this recipe during a snowy weekend when my nieces and nephews were visiting. What started as a creative way to use up leftover hot cocoa has now become our special tradition whenever they stay over.
Ingredients
- Whole milk: Provides the rich, creamy base for the hot cocoa. Look for organic if possible for the best flavor.
- Unsweetened cocoa powder: Brings deep chocolate flavor. Dutch processed works best for smoothness.
- Granulated sugar: Balances the bitterness of the cocoa. You can adjust to your sweetness preference.
- Pure vanilla extract: Adds warmth and complexity. Always use pure rather than imitation for best results.
- Salt: Enhances all the flavors. Just a pinch makes everything taste more chocolatey.
- Root beer: Should be cold and fizzy. Choose a quality craft brand for more complex flavor notes.
- Premium vanilla ice cream: Creates the signature snowcap. Splurge on the good stuff here.
- Whipped cream: Adds an extra layer of decadence. Freshly whipped gives the best texture.
- Chocolate shavings: Provide visual appeal and extra chocolate flavor in each sip.
Tired of Takeout? 🥡
Get 10 meals you can make faster than delivery arrives. Seriously.
One email. No spam. Unsubscribe anytime.
Instructions
- Create the hot chocolate base:
- Combine milk, cocoa powder, sugar, vanilla extract, and salt in a saucepan over medium heat. Whisk continuously for about 4 minutes until everything is fully incorporated and steaming hot. Watch carefully to prevent boiling which can make the cocoa grainy. The mixture should coat the back of a spoon when ready.
- Build the foundation:
- Divide the hot chocolate mixture evenly between two heatproof mugs or glasses, filling each only halfway. This leaves crucial room for the remaining components. The vessels should be prewarmed if possible to keep the cocoa hot longer.
- Create the fizzy middle layer:
- Pour the chilled root beer slowly down the side of each mug to minimize excessive foaming. Use exactly half a cup per serving. The temperature contrast between the hot cocoa and cold root beer creates a delightful reaction as they meet.
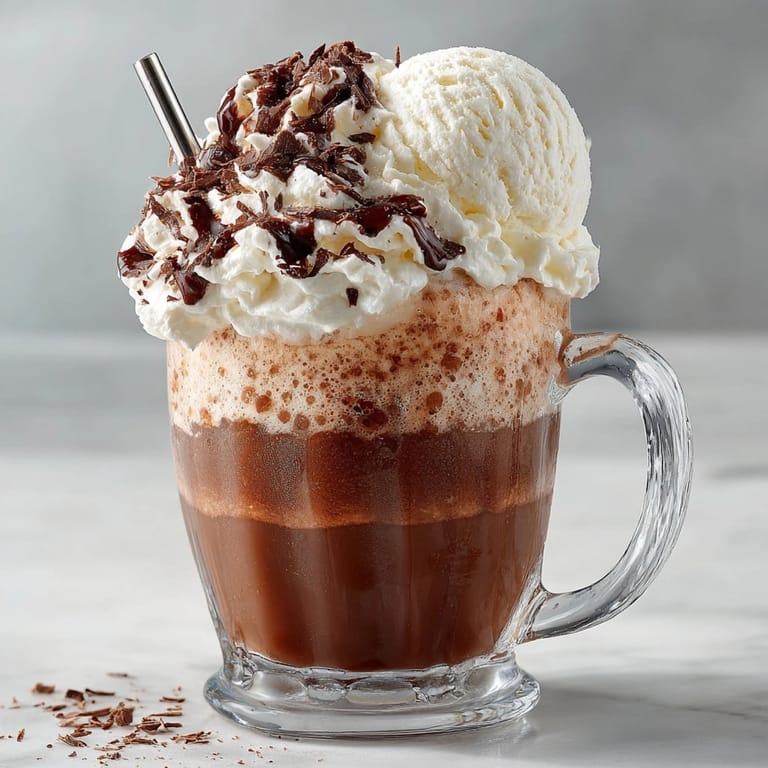
- Add the snowcap topping:
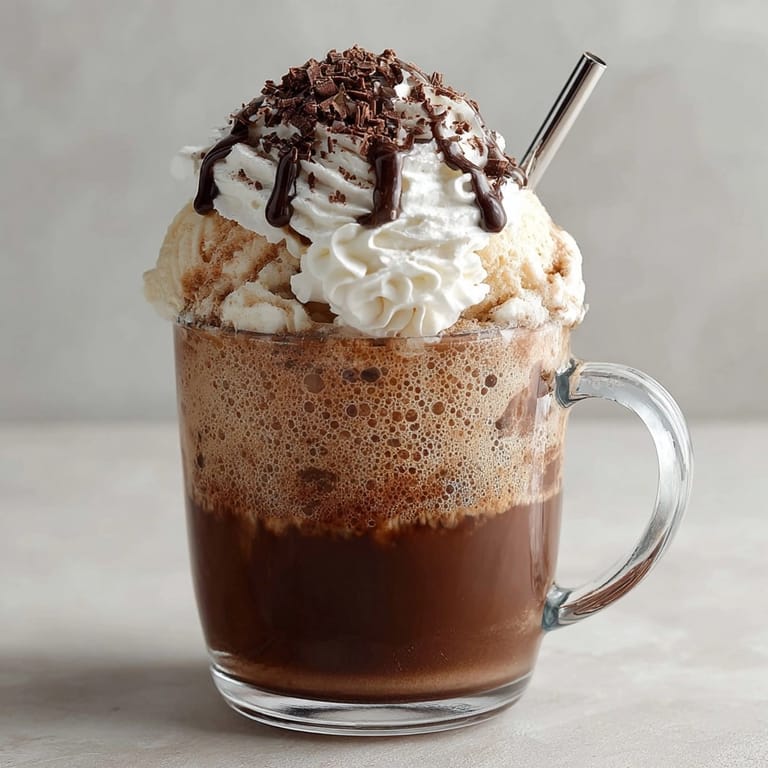
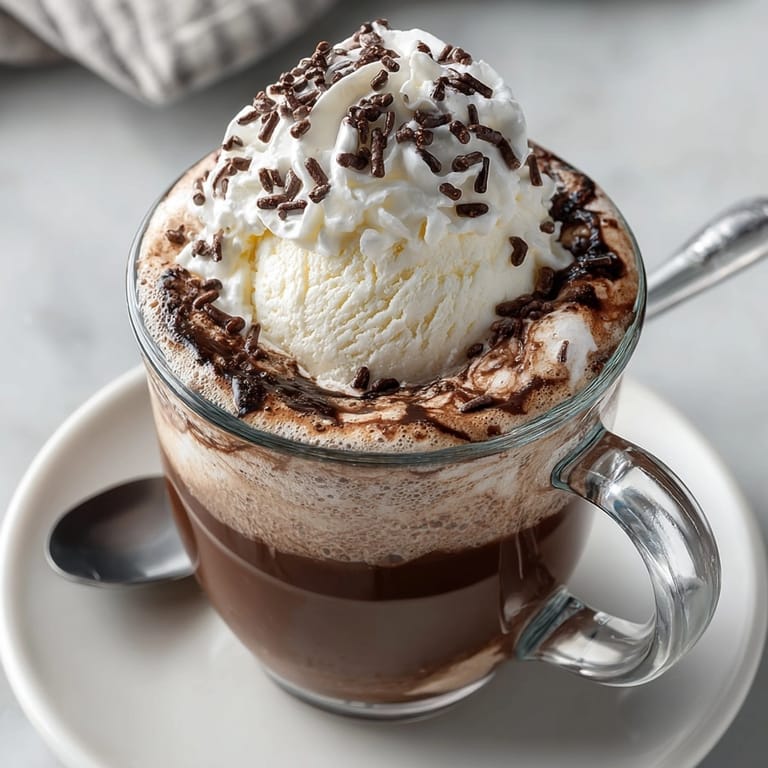
- Gently place a generous scoop of premium vanilla ice cream on top of each drink. The ice cream should partially melt into the warm cocoa while maintaining its shape on top, creating the signature snowcap effect that gives this treat its name.
- Finish with flair:
- Crown each float with a swirl of whipped cream if desired and scatter chocolate shavings or sprinkles across the top. These final touches not only enhance the visual appeal but add textural interest to each spoonful.
- Serve immediately:
- Provide both a long spoon and straw with each serving. The spoon allows guests to enjoy the melting ice cream while the straw lets them experience the unique flavor combination of the cocoa and root beer layers together.
 Save
Save My absolute favorite part of this recipe is watching guests take their first sip. There's always a moment of surprise followed by pure delight as they experience the unexpected combination of flavors. It reminds me of the old fashioned soda fountains my grandmother used to describe from her childhood.
Temperature Balance Tips
The success of this float depends on the perfect temperature contrast. The hot cocoa should be steaming but not scalding, while the root beer needs to be thoroughly chilled. This ensures the magical fizzing reaction happens without immediately melting all the ice cream. I recommend refrigerating the root beer for at least 3 hours before making this recipe.
Creative Variations
This recipe welcomes personalization based on your preferences. Try using dark chocolate cocoa powder for a more sophisticated flavor profile. Experiment with different soda flavors like cherry cola, cream soda, or even orange soda for a chocolate orange twist. For adults, a splash of coffee liqueur or root beer schnapps adds a grown up dimension to this playful treat.
Serving Suggestions
These floats make a spectacular ending to a casual dinner party or a special afternoon treat during winter gatherings. Serve alongside simple butter cookies or brownies cut into small squares. For maximum impact, create a float bar where guests can customize their own drinks with different ice cream flavors and toppings like caramel sauce, crushed cookies, or toasted marshmallows.
Historical Context
This creation draws inspiration from both traditional ice cream floats popularized in American soda fountains during the late 19th century and European hot chocolate traditions. The combination represents a playful fusion of these beloved treats, bringing together generations of comfort foods in one glass. Root beer itself has a fascinating American history, originally made from sassafras root bark before modern commercial versions.
Make Ahead Options
While the assembled float must be served immediately, you can prepare components in advance. Make the hot chocolate base and refrigerate for up to two days. When ready to serve, gently reheat the cocoa, then proceed with the remaining steps. Having chilled glasses ready and ice cream pre scooped on a frozen tray can help streamline assembly for larger gatherings.
 Save
Save The visual appeal is half the experience. For an extra special presentation, freeze your serving glasses for about 15 minutes before assembling to maintain the temperature contrast even longer.
Recipe FAQ
- → What type of cocoa is best for the hot cocoa base?
Unsweetened cocoa powder delivers a rich, chocolaty flavor and balances the sweetness of root beer and ice cream.
- → Can I make this dairy-free?
Yes, simply substitute plant-based milk and non-dairy ice cream in place of dairy ingredients to suit your diet.
- → How do I prevent the drink from overflowing when adding root beer?
Pour the root beer into the mug slowly to control the fizz and avoid spills caused by the foamy reaction with the hot cocoa.
- → Is there a substitute for root beer?
Cream soda can replace root beer for a sweet, vanilla-infused twist on the classic float flavor profile.
- → What toppings work well with this float?
Try whipped cream, chocolate shavings, sprinkles, or even a drizzle of chocolate sauce for added decadence.