 Save
Save I was rummaging through the pantry one evening, craving something crunchy but unwilling to run to the store. A half-used pack of lumpia wrappers caught my eye, leftover from a weekend spring roll session. I remembered a trick my cousin used to do—cutting them into strips and crisping them up with whatever oil she had on hand. That night, I tossed them with garlic oil, slid them into the air fryer, and the smell alone had my roommate asking what I was making. They turned out so addictive we ate the entire batch standing at the counter.
The first time I brought these to a potluck, I stacked them in a bowl next to some sweet chili sauce and watched them disappear in minutes. One friend kept asking if I had fried them in a wok, surprised when I said it was just the air fryer. Another grabbed a handful and said they tasted like the crispy bits from her grandmothers kitchen, the ones she used to sneak before dinner was served. That night, I realized how something this simple could spark so many memories for people.
Ingredients
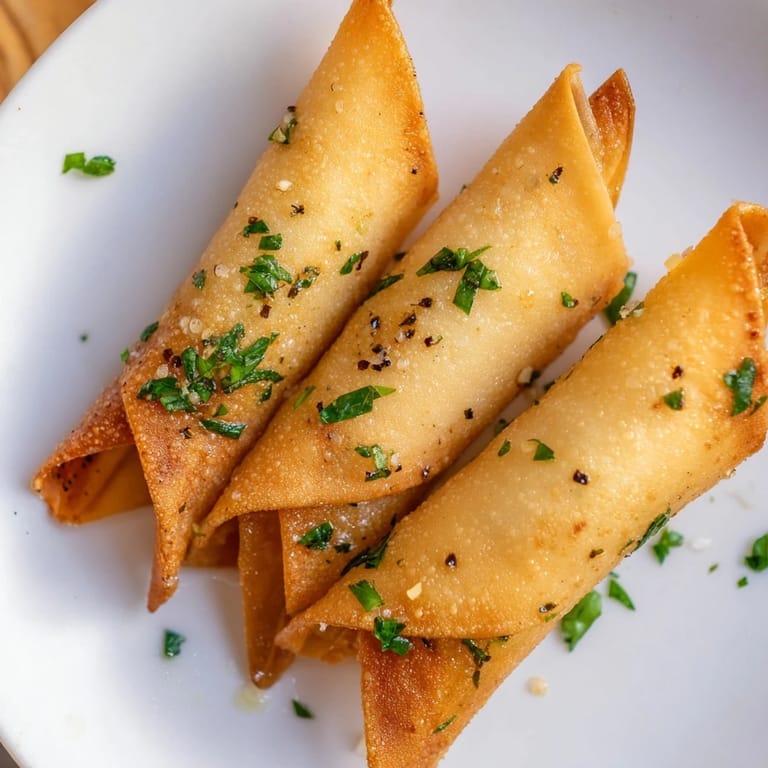
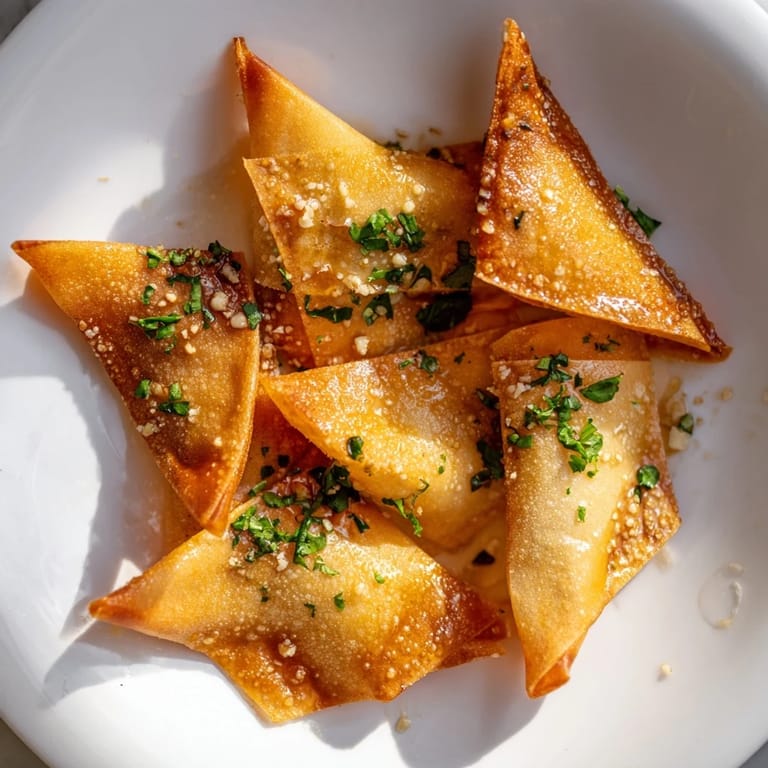
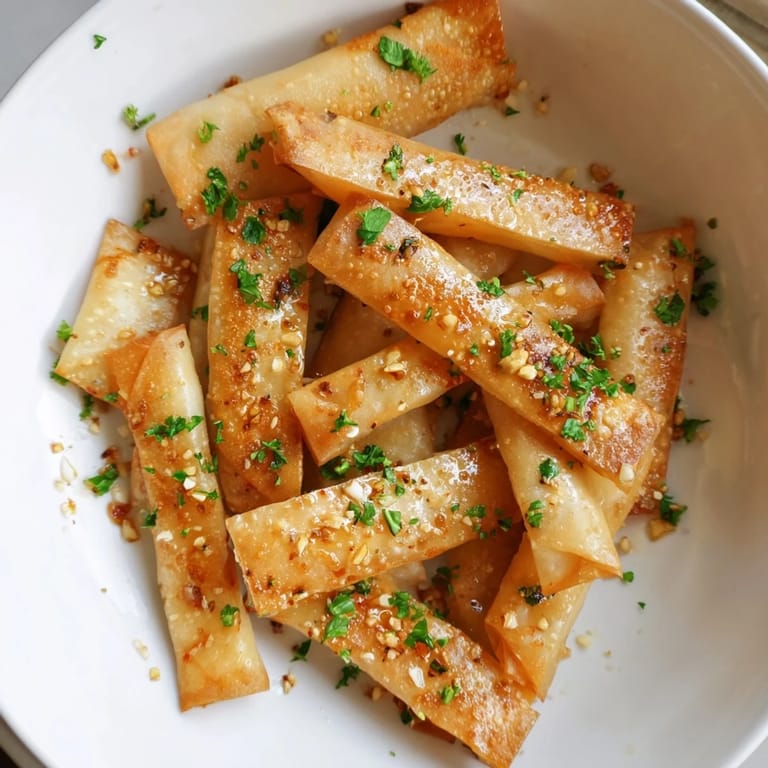
- Lumpia wrappers: These thin, delicate sheets crisp up beautifully in the air fryer, turning golden and shattering at the slightest bite. Keep them covered with a damp towel while you work so they do not dry out and crack.
- Neutral oil: Canola or vegetable oil lets the garlic shine without competing flavors. I have used olive oil before, but it can taste a bit heavy for this snack.
- Garlic cloves: Fresh garlic, minced fine, blooms into sweet, nutty bits when warmed gently in oil. Do not rush this step or it will turn bitter instead of fragrant.
- Sea salt: A little goes a long way, clinging to the oiled wrappers and amplifying every savory note. Taste as you go, especially if your wrappers are already lightly salted.
- Ground black pepper: Just a whisper of heat that wakes up the garlic without stealing the spotlight.
- Fresh parsley or chives: Optional, but a sprinkle of green at the end makes the chips look alive and adds a tiny burst of freshness.
Tired of Takeout? 🥡
Get 10 meals you can make faster than delivery arrives. Seriously.
One email. No spam. Unsubscribe anytime.
Instructions
- Preheat the air fryer:
- Set it to 180 degrees Celsius and let it warm up for about 3 minutes. This ensures the wrappers start crisping the moment they hit the basket.
- Slice the wrappers:
- Stack them neatly and use a sharp knife or kitchen scissors to cut them into thin strips or small triangles, roughly 3 centimeters wide. Work quickly so they do not dry out.
- Infuse the garlic oil:
- Heat the oil gently in a small saucepan over low heat, add the minced garlic, and stir until it turns golden and your kitchen smells like a dream, about 2 minutes. Pull it off the heat and let it cool just enough to handle safely.
- Season the wrappers:
- Toss the sliced wrappers in a large bowl, drizzle the warm garlic oil over them, sprinkle in the salt and pepper, and mix gently with your hands so every piece gets a little love. Be gentle, they tear easily.
- Air fry in batches:
- Lay the coated strips in a single layer in the air fryer basket, making sure they are not piled on top of each other. Fry for 5 to 7 minutes, giving the basket a good shake halfway through, until they are golden and crispy.
- Cool and repeat:
- Transfer the chips to a wire rack to cool and stay crisp. Repeat with the remaining wrappers, resisting the urge to eat them all before the next batch is done.
- Garnish and serve:
- Scatter a bit of chopped parsley or chives over the top if you are feeling fancy, then serve them warm or let them cool completely for maximum crunch.
 Save
Save One rainy afternoon, I made a double batch of these chips and settled in with a bowl of sweet chili sauce, watching the rain streak down the window. My neighbor knocked to borrow some sugar and ended up staying for an hour, dipping chips and sharing stories about her childhood in Manila. She said the garlic reminded her of the smell of her mothers kitchen on Sunday mornings, and I realized food does not need to be complicated to carry that kind of warmth.
Flavor Variations You Can Try
I have stirred a pinch of chili flakes into the garlic oil for a spicy kick that sneaks up on you after the first bite. Smoked paprika works beautifully too, lending a subtle campfire sweetness that pairs perfectly with a cold drink. You can also toss in a bit of grated Parmesan right after frying if you are not keeping it dairy free, the cheese melts just enough to cling to the crispy edges.
Serving Suggestions and Dips
These chips shine alongside sweet chili sauce, the kind with little flecks of red pepper that catch the light. I have also served them with a quick vinegar dip, just rice vinegar, soy sauce, and a touch of sugar, the way my family eats lumpia. For something richer, try a garlic aioli or even a spicy mayo, though honestly they are good enough to eat plain while standing at the counter.
Storage and Make Ahead Tips
Once completely cool, store the chips in an airtight container lined with a paper towel to soak up any lingering moisture. They will stay crisp for about two days, though I have never had a batch last that long. If they soften, you can revive them with a quick minute in the air fryer at the same temperature, just watch them closely so they do not burn.
- Prep the garlic oil a day ahead and store it in the fridge, then bring it to room temperature before tossing with the wrappers.
- Slice the wrappers in advance and keep them sealed in a bag with a damp paper towel to prevent drying.
- Do not garnish until right before serving or the herbs will wilt and lose their brightness.
 Save
Save There is something quietly satisfying about turning leftover wrappers into something this good, a little garlic, a little heat, and suddenly you have a snack that feels like a small celebration. Keep a pack of wrappers in your pantry and you will always be ready for those evenings when you need something crispy, fast, and worth sharing.
Recipe FAQ
- → What type of wrappers are used for the chips?
Thin lumpia wrappers are sliced into strips to create the base for these crispy chips.
- → How is the garlic flavor infused into the chips?
Minced garlic is gently sautéed in oil to release its aroma before coating the wrapper strips.
- → Can I use an alternative cooking method to the air fryer?
While air frying yields crisp results, baking or deep-frying can also be used with careful attention to texture.
- → What seasonings enhance the chips’ flavor?
Sea salt and ground black pepper are added for seasoning, with optional chili flakes or smoked paprika for extra kick.
- → Are these chips suitable for a vegan diet?
Yes, they are vegan and dairy-free as they contain no animal products.
- → How can I store leftover chips to keep them crispy?
Store chips in an airtight container once cooled to maintain their crisp texture.